Overview
The Nether and The End are dimensions in Minecraft, each offering distinct experiences. The Nether is a fiery, dangerous realm with unique resources and hostile creatures. The End is a mysterious, lonely land home to the Ender Dragon, a powerful boss creature. While a Vanilla server provides the authentic Minecraft experience, Spigot and Paper servers enhance performance and allow for extensive customization through plugins and mods, catering to players who want to tailor their gameplay or host more comprehensive and dynamic servers.
Note: Make a backup of existing saves on the server.
Note: Moving from Vanilla to Paper/Spigot moves The Nether and The End folders into the root directory. Moving from Paper/Spigot to Vanilla generates new dimension saves into the world save folder.
| Main |
The Nether |
The End |
|
| Vanilla | /[World Name] | /[World Name]/DIM-1 |
/[World Name]/DIM1 |
| Paper/Spigot | /[World Name] | /[World Name]_nether | /[World Name]_the_end |
How to Transfer Paper/Spigot DIM Saves to Vanilla
Step 1. Log in to the Meloncube Games panel.
Step 2. Stop the server.![]()
Step 3. Go to the Config Files tab on the left and select Server Properties.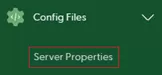
Step 4. Take note of the Level Name field.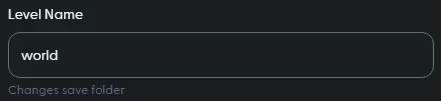
Step 5. Go to the Minecraft Jar tab on the left.![]()
Step 6. Under Modloader, choose Vanilla Minecraft.![]()
Step 7. Click Install next to the preferred version on the right.![]()
Step 8. Press Install to confirm.![]()
Step 9. Choose Keep current files and update JAR from the dropdown and click Next.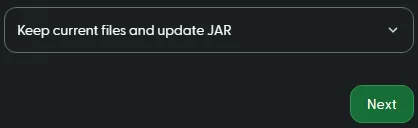
Step 10. Start the server.![]()
Step 11. Once fully started, stop the server.![]()
Step 12. Go to the Files tab on the left.![]()
Step 13. Open the [World Name] folder from Step 5.![]()
Step 14. Mark the checkbox beside DIM-1 and DIM1.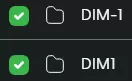
Step 15. Click the Delete button at the bottom.![]()
Step 16. Press Delete to confirm.![]()
Step 17. Go back to the Files tab on the left.![]()
Step 18. Open the [World Name]_nether folder.![]()
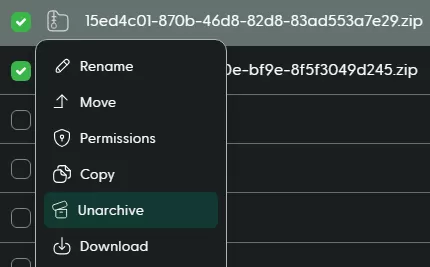
Step 19. Mark the checkbox beside DIM-1.![]()
Step 20. Click the Download button at the bottom.![]()
Step 21. Go back to the Files tab on the left.![]()
Step 22. Open the [World Name]_the_end folder.![]()
Step 23. Mark the checkbox beside DIM1.![]()
Step 24. Click the Download button at the bottom.![]()
Step 25. Go back to the Files tab.![]()
Step 26. Open the [World Name] folder.![]()
Step 27. Upload the downloaded files from Steps 21 and 25.![]()
Step 28. Unarchive both files from Step 28.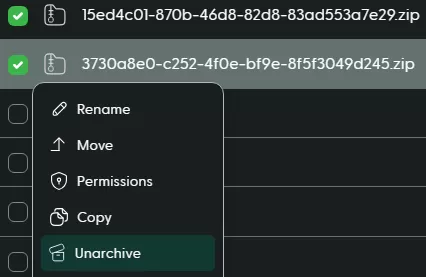
Step 29. Go back to the Files tab.![]()
Step 30. Mark the checkbox beside [World Name]_nether and [World Name]_the_end.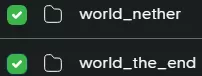
Step 31. Click the Delete button at the bottom.![]()
Step 32. Press Delete to confirm.![]()
Step 33. Start the server.![]()