Overview
In Minecraft, snapshots refer to early, experimental versions of upcoming updates released for testing purposes. These snapshots allow players to preview and provide feedback on new features, changes, and bug fixes before the official release. While they can contain exciting content, snapshots are not entirely stable and may have unresolved issues. By exploring these snapshots, players can contribute to the development process by testing new functionalities and providing valuable feedback to the Minecraft development team.
Note: Exercise caution when installing snapshots, as they may lead to potential server issues such as crashes, lag, and world corruption.
Note: When using the 1.20.3 snapshot, it is necessary to create a new world.
How To Install the 1.20.3 Snapshot on a Minecraft Server (JAR Menu)
Step 1. Log in to the Multicraft panel.![]()
Step 2. Stop the server.![]()
Step 3. Select the Open JAR Menu button.![]()
Step 4. Click Vanilla Minecraft on the left.
Step 5. Toggle the button next to Vanilla Minecraft Snapshot 22w45a.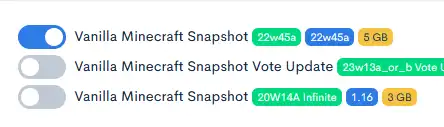
Step 6. Click the Save button at the bottom.![]()
Step 7. Start the server.
Step 8. Once fully booted, stop the server.![]()
Step 9. Go to the Server Properties tab on the left.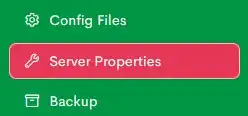
Step 10. On the initial-enabled-packs field, enter the following values: vanilla,update_1_21![]()
Step 11. Click Save at the bottom.![]()
Step 12. Go to the File Manager tab.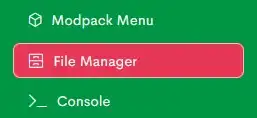
Step 13. Mark the checkbox beside the world save folder.![]()
Step 14. Click Delete.![]()
Step 15. Confirm by clicking Delete.![]()
Step 16. Start the server.
How To Install the 1.20.3 Snapshot on a Minecraft Server (Manual)
Step 1. Download the Minecraft server jar snapshot.
Step 2. Rename server.jar to customjava17.jar.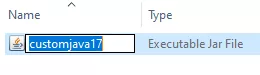
Step 3. Minimize the file to use later in the guide.
Step 4. Log in to the Multicraft panel.![]()
Step 5. Stop the server.![]()
Step 6. Select the Open JAR Menu button.![]()
Step 7. Click Custom on the left.
Step 8. Toggle the button next to Custom Java 17.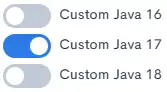
Step 9. Click Save at the bottom.![]()
Step 10. Go to the File Manager tab on the left.
Step 11. Drag and drop the .jar file from step 3.
Step 12. Start the server.
Step 13. Once fully booted, stop the server.![]()
Step 14. Go to the Server Properties tab on the left.
Step 15. On the initial-enabled-packs field, enter the following values: vanilla,update_1_21![]()
Step 16. Click Save at the bottom.![]()
Step 17. Return to the File Manager tab.
Step 18. Mark the checkbox beside the world save folder.![]()
Step 19. Click Delete.![]()
Step 20. Confirm by clicking Delete.![]()
Step 21. Start the server.