Overview
NeoForge is a fork of Minecraft Forge, a framework that lets players and developers create and add mods to Minecraft, making the game more exciting. NeoForge follows a structured method for modding, enabling the community to develop different mods. These mods can bring in new features, items, creatures, and more, adding depth and variety to the Minecraft experience. This allows players to customize their gameplay and explore a wide range of creative possibilities within the Minecraft universe.
Note: The server must fully boot once to generate config files and folders.
How To Install NeoForge on a Minecraft Server
Step 1. Log in to the Meloncube Games panel.
Step 2. Stop the server.![]()
Step 3. Open the Minecraft Jar menu.![]()
Step 4. Select NeoForge on the left.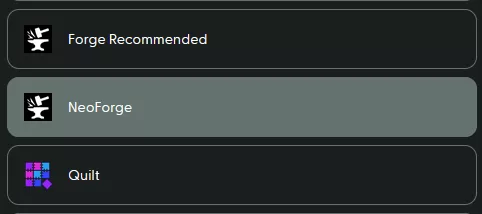
Step 5. Press the Install button next to the preferred version. NeoForge for Minecraft version 1.21.1 is used in this example.![]()
Step 6. Decide what to do with existing files and hit Next. 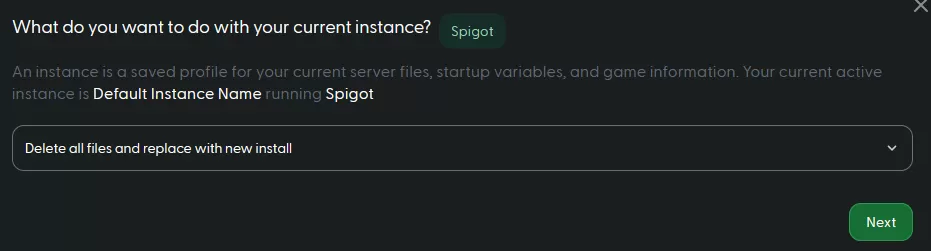
Step 7. Start the server.![]()
How to Install NeoForge on a Minecraft Server (Manual)
Step 1. Download NeoForge.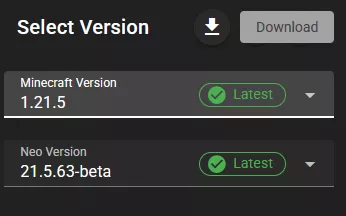
Step 2. Open the NeoForge Installer, choose Install server and check Server Starter Jar.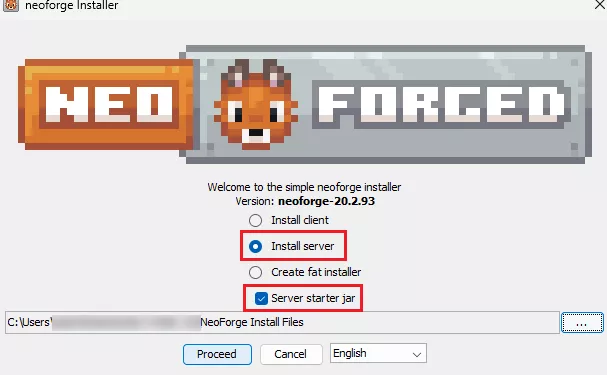
Step 3. Change the install location to a folder.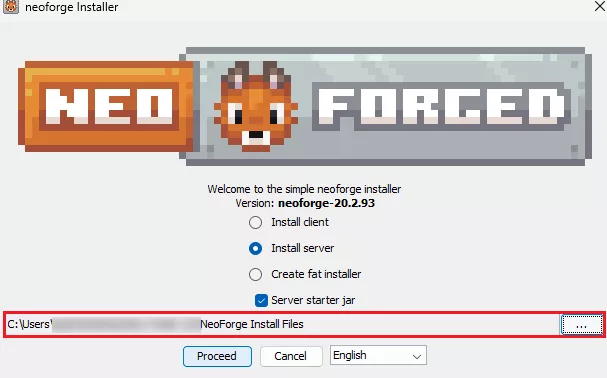
Step 4. Hit Proceed.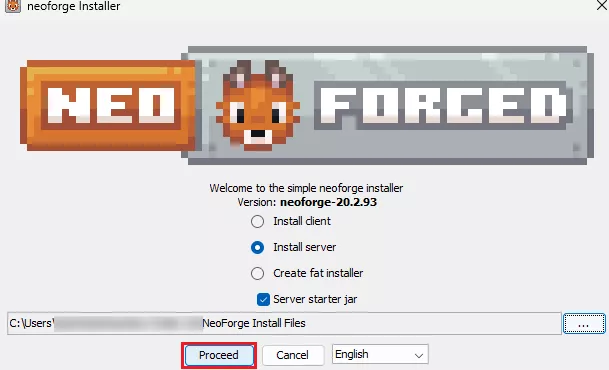
Step 5. Once finished, navigate to the folder.![]()
Step 6. Select all files. Right-click and choose Send to>Compressed (zipped) folder. 
Step 7. Minimize the .zip file to use later in the tutorial.
Step 8. Log in to the Meloncube Games panel.
Step 9. Stop the server.![]()
Step 10. Open the Minecraft Jar menu.![]()
Step 11. Select Custom on the left.![]()
Step 12. Install Custom JAR (Non-NeoForge/Forge 1.17-1.20.1). 
Step 13. Press the Install button.![]()
Step 14. Decide what to do with existing files and hit Next.
Step 15. Wait for the setup to complete.![]()
Step 16. Go to the Files tab.![]()
Step 17. Upload the .zip file from Step 7.![]()
Step 18. Right-click on the .zip file and choose Unarchive.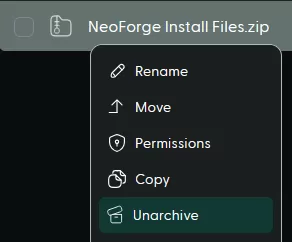
Step 19. Go to the Home tab.![]()
Step 20. On the Java Version table, choose Java 21.
Note: Java Adoptium is the default option, although some modpacks may perform better on other versions.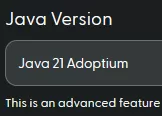
Step 21. Start the server.![]()