Overview
Forge is a widely used modding platform for Minecraft. It acts as a mod loader, allowing players to install and manage mods easily. Forge provides a stable and reliable framework for mod developers to create and customize game modifications.
Note: The server must fully start once to generate config files and folders.
How To Install Forge on a Minecraft Server
Step 1. Log in to the Meloncube Games panel.
Step 2. Stop the server.![]()
Step 3. Open the Minecraft Jar menu.![]()
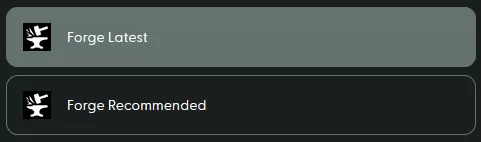
Step 4. Click Forge Latest or Forge Recommended on the left.
Latest - most recent versions
Recommended - most stable versions
Step 5. Press the Install button next to the preferred version.![]()
Step 6. Decide what to do with existing files and hit Next.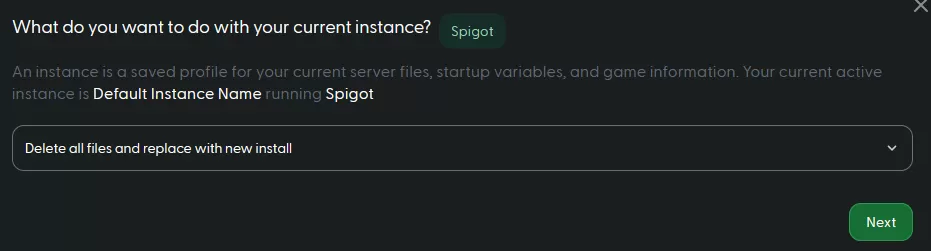
Step 7. Start the server.![]()
How to Install Forge on a Minecraft Server (Manual)
Step 1. Download Forge.
Step 2. Pick a version and click Installer.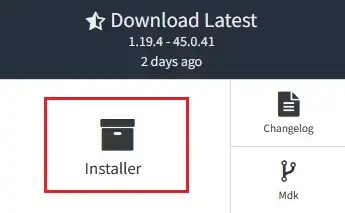
Step 3. Launch the Forge installer and choose Install server.
Step 4. Change the install location to a folder.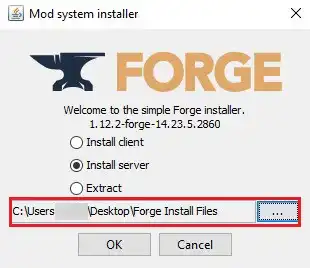
Step 5. Hit OK.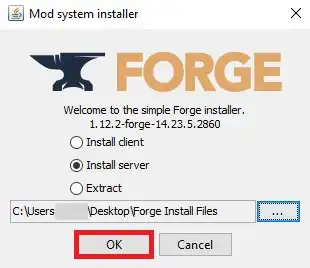
Step 6. Once finished, navigate to the folder.![]()
Step 7. Copy the name of the forge-<mc_version>-<loader_version>.jar.
If there is no .jar, skip this step.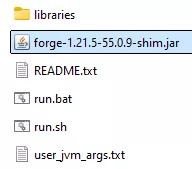
Step 8. Select all files. Right-click and choose Send to>Compressed (zipped) folder. 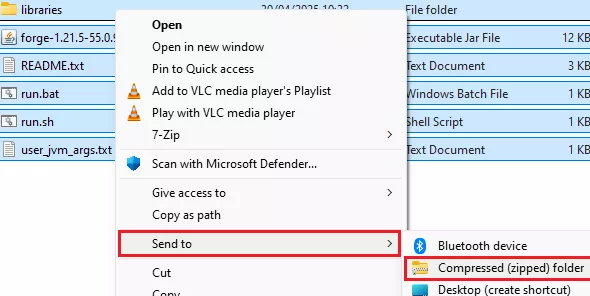
Step 9. Minimize the .zip file to use later in the tutorial.
Step 10. Log in to the Meloncube Games panel.
Step 11. Stop the server.![]()
Step 12. Open the Minecraft Jar menu.![]()
Step 13. Select Custom on the left.![]()
Step 14. Depending on the version, click Install next to the following options:
Forge Versions 1.17-1.20.1: Custom JAR (Forge/Neo 1.17-1.20.1)
All Other Versions: Custom JAR (Non-NeoForge/Forge 1.17-1.20.1)
![]()
Step 15. Press the Install button.![]()
Step 16. Decide what to do with existing files and hit Next.
Step 17. Wait for the setup to complete.![]()
Step 18. Go to the Files tab.![]()
Step 19. Upload the .zip file from Step 9.![]()
Step 20. Right-click on the .zip file and choose Unarchive.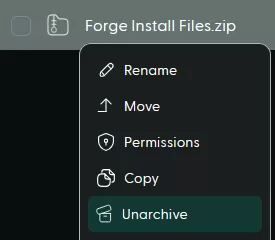
Step 21. Go to the Startup tab.![]()
Step 22. On the Server Jar File table, input the .jar name from Step 7.
If there was no .jar, skip this step.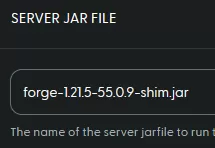
Step 23. Go to the Home tab.![]()
Step 24. On the Java Version table, select the appropriate version.
Note: Java Adoptium is the default option, although some modpacks may perform better on other versions.
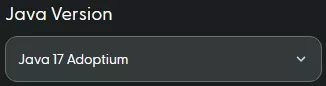
| Minecraft Version | Java Version |
| 1.16 and below | Java 8 |
| 1.17 to 1.20.1 | Java 17 |
| 1.20.2 and above | Java 21 |
Step 25. Start the server.![]()