Overview
Adding a Sub-Account to the MelonCube billing panel allows monitoring and granting limited access to managing bills, services, and more. Each Sub-Account can have its own login credentials and access privileges, allowing for customized control and restricted access as needed. By utilizing Sub-Accounts, account owners can efficiently manage their billing processes and maintain better control over their websites and servers.
Note: MelonCube is not responsible for any unwanted changes made by Sub-Accounts.
How To Add a Sub-Account
Step 1. Log in to the MelonCube Client panel.![]()
Step 2. On the upper right, click Hello, [Name]! and select Contacts/Sub-Accounts.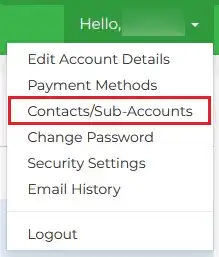
Step 3. Fill in the Sub-Account's details on the Add New Contact form.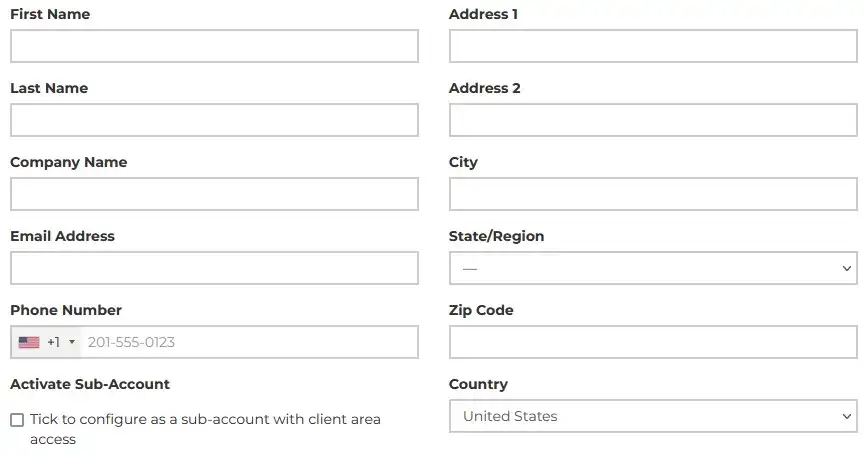
Step 4. Mark the checkbox under Activate Sub-Account. 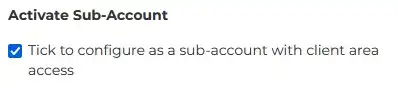
Step 5. Mark the checkboxes on the preferred Sub-Account Permissions.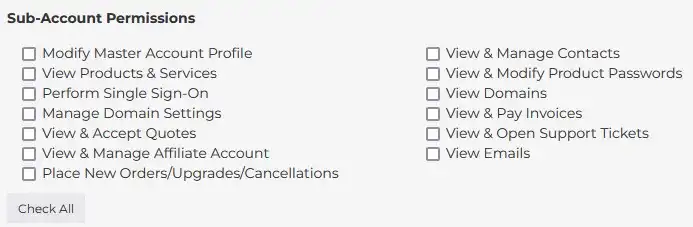
Step 6. Input a password for the Sub-Account.![]()
Step 7. Mark the checkboxes on the preferred Sub-Account Email Preferences.
Step 8. Click the Save Changes button. The new Sub-Account user will receive a confirmation email.![]()
- sub-account, sub account, billing panel, meloncube billing, add sub-account
- 13 Users Found This Useful