
Overview
BungeeCord is a popular plugin for Minecraft servers that allows players to connect to multiple server instances seamlessly. It acts as a proxy, enabling players to join different game worlds or servers without disconnecting and reconnecting manually. BungeeCord efficiently distributes incoming player connections across the available server instances, creating a smoother, more scalable multiplayer experience.
Note: Make a backup of existing saves on the server.
Note: BungeeCord requires a minimum of three servers. One server will run BungeeCord, while two or more servers will be connected to the network.
Note: These are example servers for this guide.
The game servers are running Spigot for 1.19.4.
BungeeCord Server: 1.1.1.1:25565
Hub Server: 2.2.2.2:25565
Creative Server: 3.3.3.3:25565
Survival Server: 4.4.4.4:25565
How To Setup BungeeCord
Step 1. Log in to the Multicraft panel.
Step 2. Stop all servers to be used for the BungeeCord server network.![]()
Step 3. On the BungeeCord server, go to the File Manager tab on the left. 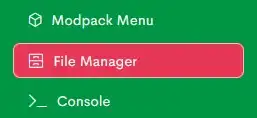
Step 4. Click the All button.
Step 5. Select the Delete button.
Step 6. Confirm by clicking the Delete button.
Step 7. Return to the Home tab.
Step 8. Select the Open JAR Menu button.![]()
Step 9. Click Network on the left.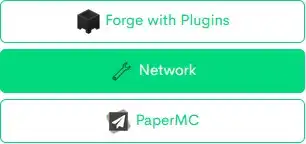
Step 10. Toggle the button next to BungeeCord. Version 1.8+ is used in this example.
Step 11. Start the server.
Step 12. Once it fully launches, stop the server.![]()
Step 13. Go back to the File Manager tab.
Step 14. Edit config.yml.
Step 15. Under listeners:, change host: to the BungeeCord server IP.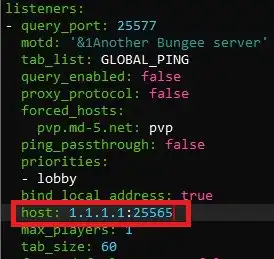
Step 16. Change ip_forward: from false to true.
Step 17. Under servers:, change lobby to the hub server name and replace localhost with the hub server IP. Changing the motd is optional.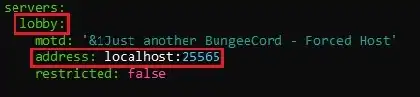
Step 18. Add the rest of the servers connecting to the BungeeCord server network.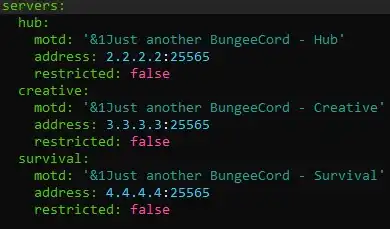
Step 19. Find the priorities: line.![]()
Step 20. Add the names of the Minecraft servers in the BungeeCord server network. Players will always enter the first server listed.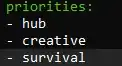
Step 21. Select Save and close on the lower right.![]()
Step 22. Return to the Home tab and select a Minecraft game server from the dropdown. Creative Minecraft Server is used in this example.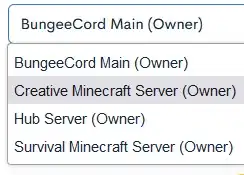
Step 23. Go to the Server Properties tab on the left.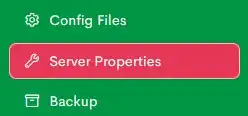
Step 24. Set Online Mode to Disabled via the dropdown.
Step 25. Click the Save button at the bottom.![]()
Step 26. Go to the File Manager tab.
Step 27. Edit spigot.yml.
Step 28. Under settings:, change bungeecord: from false to true.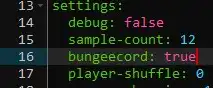
Step 29. Select Save and close on the lower right.![]()
Step 30. Edit bukkit.yml.
Step 31. Under settings:, change connection-throttle: from 4000 to -1.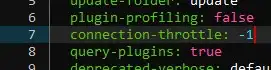
Step 32. Select Save and close on the lower right.![]()
Step 33. Repeat steps 20 to 30 for each Minecraft game server connecting to the BungeeCord server network.
Step 34. Start all servers.