Overview
The JAR Menu is a helpful tool available on the Multicraft panel that allows users to easily configure their Minecraft servers for mods, plugins, or various other gameplay-altering packs. Assisting users in navigating a variety of server installations, the JAR Menu streamlines and simplifies the entire process. Its intuitive design and efficient functionality combine to make server navigation and setup a straightforward and efficient task. Before making changes to the JAR Menu, it's important to back up the server to prevent the loss of any desired data.
Note: Make a backup of existing saves on the server.
How to Use the JAR Menu
Step 1. Log in to the Multicraft panel.![]()
Step 2. Stop the server.![]()
Step 3. Click the Open JAR Menu button.![]()
Step 4. Select the desired category.
Step 5. Toggle the button next to the preferred version. Using the latest version is recommended.
Step 6. Choose Save at the bottom of the window.![]()
Step 7. Start the server.
How to Use the JAR Menu (Updating)
Step 1. Log in to the Multicraft panel.![]()
Step 2. Stop the server.![]()
Step 3. Click the Open JAR Menu button.![]()
Step 4. Select the category.
Step 5. Toggle the button next to the latest version.![]()
Step 6. Choose Save at the bottom of the window.![]()
Step 7. Start the server.
How to Use the JAR Menu (Custom JAR File)
Step 1. Download the desired .jar file.
Step 2. Rename the .jar file depending on the preferred Java version.
| Filename | Java Version |
customjava7.jar |
Java 7 |
custom.jar |
Java 8 |
customjava9.jar |
Java 9 |
customjava11.jar |
Java 11 |
customjava14.jar |
Java 14 |
customjava15.jar |
Java 15 |
customjava16.jar |
Java 16 |
customjava17.jar |
Java 17 |
customjava18.jar |
Java 18 |
customjava19.jar |
Java 19 |
Step 3. Minimize the file to use later in the tutorial.
Step 4. Log in to the Multicraft panel.![]()
Step 5. Stop the server.![]()
Step 6. Go to the File Manager tab.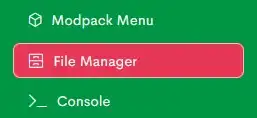
Step 7. Choose the Upload button.![]()
Step 8. Drag and drop the .jar file from Step 3.
Step 9. Return to the Home tab.
Step 10. Click the Open JAR Menu button.![]()
Step 11. Select Custom on the left.
Step 12. Toggle the button next to the matching custom jar version from Step 3.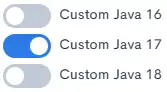
Step 13. Choose Save at the bottom of the window.![]()
Step 14. Start the server.